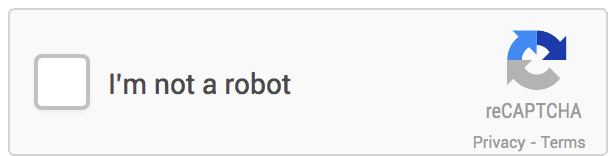
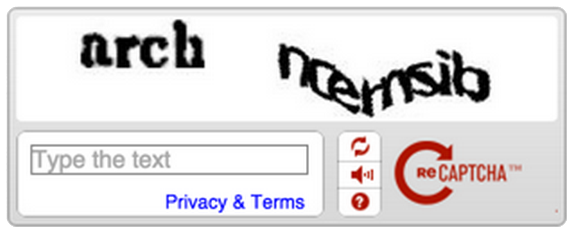
Google's reCAPTCHA has been a popular choice for CAPTCHA challenges for some years now. Not only does it cut down on spam, but it serves as a crowdsourcing mechanism for refining machine learning algorithms that read text from books, street signs, buildings, and other things from the real world. Unfortunately, as time has gone by spammers have become more sophisticated, and in return CAPTCHAs have become more difficult to solve- not only for the robots, but for the humans as well.
Recently, Google unvelied a revamp of this system that is the best of both worlds.
Google's "no CAPTCHA" reCAPTCHA update makes the process of answering CAPTCHA challenges virtually painless to humans while actually improving the security against bots. With a standard form using a full postback, this is a pretty straightforward process. Due to the improved usability, we decided to include this in <a href="https://tusksoft.com/contact" target="parent">our own contact form</a>. With a standard form using a full postback, this is a pretty straightforward process. However, using ajax validation and form submission proved to be a little bit trickier- we'll get to that in a later post. In this post, we'll cover how to use Google's reCAPTCHA with ASP.NET MVC's Html.BeginForm() Razor helper method to provide security against spammers while maintaining a nice user experience.
The first thing you'll want to do if you haven't already is sign up for the reCAPTCHA service. You can do that here. Once you've signed up for the service, you'll be provided with public and private keys to enable reCAPTCHA on your site, plus some html snippets to get you started. Now that we've got our keys, let's start by implementing reCaptcha with a standard, non-ajaxified form. Once we have this working we'll modify it from there. This is part is pretty easy. First we'll create a view model with the pertinent fields for our contact us form:
public class ContactUsViewModel
{
    public long Id { get; set; }
    [Required]
    public string Name { get; set; }
    [Required, EmailAddress]
    public string Email { get; set; }
    [DisplayName("Company (optional)")]
    public string Company { get; set; }
    [Phone, DisplayName("Phone (optional)")]
    public string Phone { get; set; }
    [DisplayName("Website (optional)")]
    public string Website { get; set; }
    [Required]
    public string Description { get; set; }
}
Then we'll create our simple view (styles removed for clarity):
@model ContactUsViewModel
<div>
@using (Html.BeginForm())
{
    <div>@Html.LabelFor(m => m.Name) @Html.TextBoxFor(m => m.Name)</div>
    <div>@Html.LabelFor(m => m.Email) @Html.TextBoxFor(m => m.Email)</div>
    <div>@Html.LabelFor(m => m.Company) @Html.TextBoxFor(m => m.Company)</div>
    <div>@Html.LabelFor(m => m.Phone) @Html.TextBoxFor(m => m.Phone)</div>
    <div>@Html.LabelFor(m => m.Website) @Html.TextBoxFor(m => m.Website)</div>
    <div>@Html.LabelFor(m => m.Description) @Html.TextAreaFor(m => m.Description)</div>
    <input type="submit" value="send it our way" />
}
</div>
And finally our controller:
public class ContactController : Controller
{
    public ViewResult Index()
    {
        return View();
    }
    [HttpPost]
    public ViewResult Index(ContactViewModel model)
    {
        if (ModelState.IsValid)
        {
            //do your processing here
            return View("Thanks");
        }
        return View();
    }
}
So now we've got all the necessary code to process a form, and assuming you've enabled unobtrusive jQuery validation (you'll need it for subsequent parts of this series), then we've got validation occurring on both the client and server sides. Simple enough, right? Now let's set about adding the reCAPTCHA control to our form. The change to our view is pretty easy:
@model ContactUsViewModel
<div>
@using (Html.BeginForm())
{
    <div>@Html.LabelFor(m => m.Name) @Html.TextBoxFor(m => m.Name)</div>
    <div>@Html.LabelFor(m => m.Email) @Html.TextBoxFor(m => m.Email)</div>
    <div>@Html.LabelFor(m => m.Company) @Html.TextBoxFor(m => m.Company)</div>
    <div>@Html.LabelFor(m => m.Phone) @Html.TextBoxFor(m => m.Phone)</div>
    <div>@Html.LabelFor(m => m.Website) @Html.TextBoxFor(m => m.Website)</div>
    <div>@Html.LabelFor(m => m.Description) @Html.TextAreaFor(m => m.Description)</div>
    <div class="g-recaptcha" data-sitekey="your-public-recaptcha-key"></div>
    <input type="submit" value="send it our way" />
}
</div>
<script src="https://www.google.com/recaptcha/api.js"></script>
Before we proceed any further, it's important to understand a little bit about how reCAPTCHA works. Once the necessary script and div have been added, reCAPTCHA will insert an additional input element into your form with a name & id of g-recaptcha-response, as you can see here:

This means that although the field is not part of our viewmodel, it is submitted along with the rest of our form data and we can access it in our action method, which is exactly what we'll do next along with adding our validation method:
public class ContactController : Controller
{
    public ViewResult Index()
    {
        return View();
    }
    [HttpPost]
    public async Task<ViewResult> Index(ContactUsViewModel model)
    {
        if (ModelState.IsValid)
        {
            if(await RecaptchaIsValid(Request.Form["g-recaptcha-response"]))
            {
                //do your processing here
                return View("Thanks");
            }
            ModelState.AddModelError(
                "invalid-recaptcha-response",
                "Please answer the recaptcha challenge.");
        }
        return View();
    }
    private async Task<bool> RecaptchaIsValid(string captchaResponse)
    {
        var requestUrl =
            String.Format(
                "https://www.google.com/recaptcha/api/siteverify?secret={0}&response={1}&remoteip={2}",
                "my-recaptcha-secret",
                captchaResponse,
                Request.UserHostAddress);
        string result;
        using (var client = new HttpClient())
        {
            result = await client.GetStringAsync(requestUrl);
        }
        if (!String.IsNullOrWhiteSpace(result))
        {
            var obj = JsonConvert.DeserializeObject<RecaptchaResponse>(result);
            if (obj.Success)
            {
                return true;
            }
        }
        return false;
    }
    private class RecaptchaResponse
    {
        public bool Success { get; set; }
        [JsonProperty("error-codes")]
        public ICollection<string> ErrorCodes { get; set; }
        public RecaptchaResponse()
        {
            ErrorCodes = new HashSet<string>();
        }
    }
}
So let's step through what we've added here. Now in the HttpPost overload of Index, we are first checking the validity of the ModelState just as we did before. However, if that validation is successful we're now taking the additional step of validating the reCAPTCHA response that has been appended to our form data by calling Request.Form["g-recaptcha-response"]. That value is passed into the RecaptchaIsValid method which makes a remote request to Google's server, following the format outlined here. reCAPTCHA requires you to pass in 3 pieces of information to validate the response passed in with the form: 1) the secret key provided to you when you registered for the service, 2) the response that reCAPTCHA tacked onto your form, and 3) The IP address of the client. We call String.Format to insert these into the provided URL before making the request. Since we're making an asynchronous request with our HttpClient, the validation method is decorated with the async modifier, and since asynchronous code tends to be contagious our action method is now also marked async as well. Our private class RecaptchaResponse is a C# representation of the JSON formatted response object returned by Google which is also defined in the afforementioned link, as are the possible error codes. We deserialize the JSON response from Google into an instance of RecaptchaResponse and check for success. If success, great! There's a good chance our end user isn't a robot. If !success, we tack on an error to our ModelState which is returned to the client's browser instructing them to answer the recaptcha challenge.
A couple of things worth noting at this point...
- Since Google does return specific error messages on failure, we could read individual error codes and display specific error messages to the user. We're skipping that in this article for the sake of simplicity.
- We could potentially use a custom ModelBinder or ValueProvider to bind the "g-recaptcha-response" field to a member of our viewmodel, but since this is one-off functionality and we don't plan on binding fields with names containing dashes to our viewmodels anywhere else within the app, we've opted to grab the value from the Form collection directly.
Now we have all the code we need to ensure that our users are not robots. This works, but it's not the greatest user experience. Even if you've enabled client-side validation, we're still making a full round trip to the server everytime we want to validate our reCAPTCHA response. In the next part of this series we'll modify this code to use remote validation and ajax form submission to give end users a more refined and snappier UX.